
Introduction — a clear fault, a clear need
I’ll be blunt: many lab rigs promise precision and then fail under real use. The second sentence here names the device I mean—automated stereotaxic Instrument—and I say that because I’ve watched whole experiments slide off target when motion control and calibration weren’t held to the same standard as the science. Data: typical placement errors in small rodent work can run several hundred microns, and that wrecks repeatability (yes, even with modern controls). So my question for you: how do we build a tool that keeps promises rather than just specs? I’ll walk you through the practical bits, from motors to software, and why small choices compound into big failures. This is mechanic English — short, direct, practical — and we’ll move next into what usually goes wrong and why it matters.
I speak as someone who’s tightened screws at midnight and re-run alignment checks at dawn. I care about terms like servo motors, xyz stage, and stereotaxic coordinates because they aren’t academic words to me — they’re the knobs and numbers that make or break a run. Expect frank notes on tolerance, calibration, and human error. We’ll follow a problem-driven arc: identify the failure modes, then propose fixes. Ready? Let’s dig in.

Deeper layer: Why traditional rigs fail the lab (and the user)
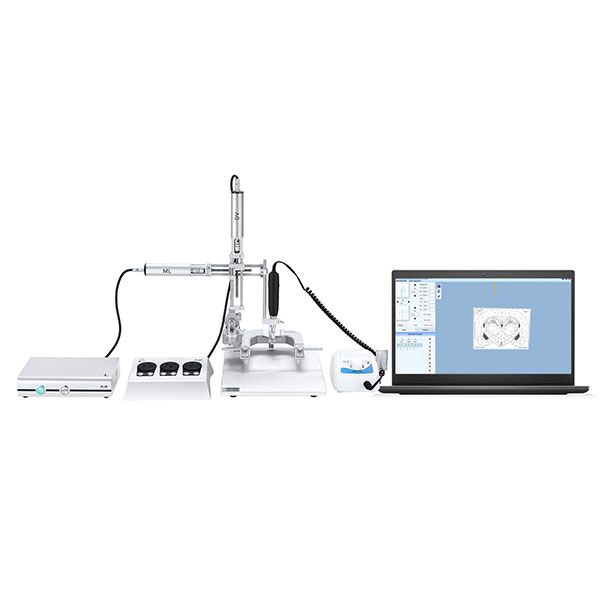
Start with the tool everyone needs: the small animal stereotaxic instrument. At first glance it looks simple — stage, arm, coordinate readout. Break it down and you see multiple subsystems that must play together: the micro-manipulator, servo motors, and a precise brain atlas mapping. I’ll define the failure modes in plain terms. Most systems assume ideal conditions: rigid mounts, perfect zeroing, and unflinching repeatability. Reality? Platforms flex, thermal drift creeps in, and payload shifts. Those mismatches create systematic error in stereotaxic coordinates and force you to chase variability instead of controlling it. Look, it’s simpler than you think: bad assumptions add up.
What exactly breaks first?
Two common culprits stand out. First, poor calibration flows into poor data. If your zero is off by 100 µm, every target misses by that offset. Second, mechanical play — backlash in the xyz stage or loosened fasteners — lets the arm settle differently each trial. Together, they make reproducibility a hope, not a design outcome. I’ve rebuilt rigs where a loose set screw was the villain; we tightened it and saved weeks. That’s not elegant — it’s human, and instructive. Other industry terms to watch: micro-manipulator drift, payload balance, and calibration protocol. These are not buzzwords; they tell you where to look when results wobble.
Forward-looking: Principles to make the next generation work
What should you demand from a future-ready small animal stereotaxic instrument? I favor three guiding principles. First, design for closed-loop feedback: sensors that measure actual probe position and correct servo commands in real time. Second, engineer modular calibration routines that are quick and automated; don’t force a tech to eyeball the zero. Third, plan for environmental compensation — thermal drift and table vibration matter. These ideas rely on familiar pieces — encoders, control loops, and calibration jigs — but applied together they change outcomes. — funny how that works, right?
Let me be concrete. Add high-resolution encoders on each axis, pair them with low-latency controllers, and use a standard brain atlas mapping to convert coordinates robustly. Use rigid mounting and preload bearings to remove slack. For software, implement a calibration wizard that runs in minutes and stores profiles per animal and per experiment. The result: fewer aborted runs, faster throughput, and more confidence in your data. You’ll need modest investments in parts and testing time, but you reclaim hours of lost work — and sanity. What’s next: build, test, and measure with clear metrics.
What to measure before you buy
Here are three metrics I use when evaluating systems: 1) Absolute placement repeatability (µm) over 100 cycles; 2) Time-to-calibrate (minutes) — shorter is better; 3) Drift per hour under load (µm/hr). If a vendor can’t give you honest numbers for these, push them. I’ll close by saying I prefer tools that respect the user’s time and the science. No gimmicks, just measurable performance. For practical sourcing and informed choices, I trust partners who publish data and stand by it — like BPLabLine.